[amazon_link asins=’B07S1BMMGH,B00RKJS8MQ’ template=’ProductCarousel’ store=’azhb-wp-amazon-link-builder-20′ marketplace=’US’ link_id=’1490e07b-79dc-4ee4-821c-0b6d0bac1ba3′]
This information is for reference only. You should always rely on the manufacturer’s instructions when performing switch installations. Manufacturer instructions can change at any time and this website cannot guarantee the accuracy of the information.
WARNINGS AND CAUTIONS:
- TO AVOID FIRE, SHOCK OR DEATH; TURN OFF POWER AT CIRCUIT BREAKER OR FUSE AND TEST THAT POWER IS OFF BEFORE WIRING!
- To be installed and/or used in accordance with electrical codes and regulations.
- If you are unsure about any part of these instructions, consult an electrician.
- Manufacturer smart-switches must be used with compatible devices for multi-location switching.
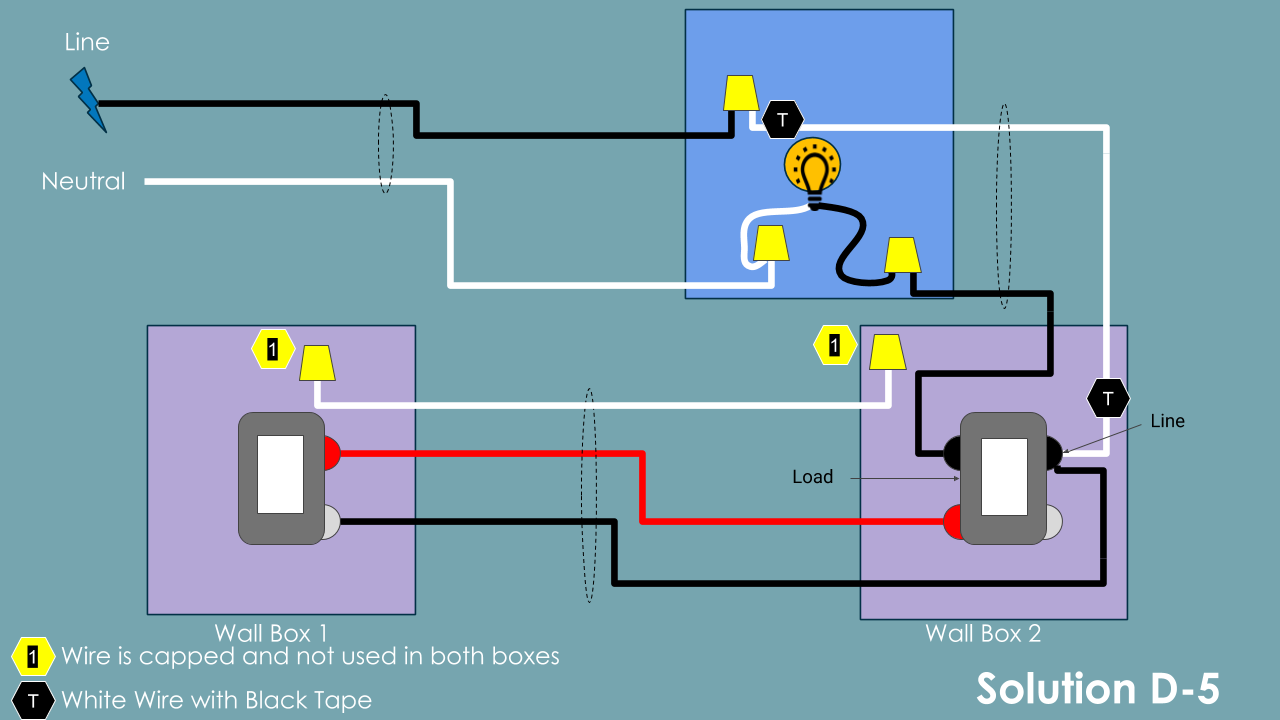
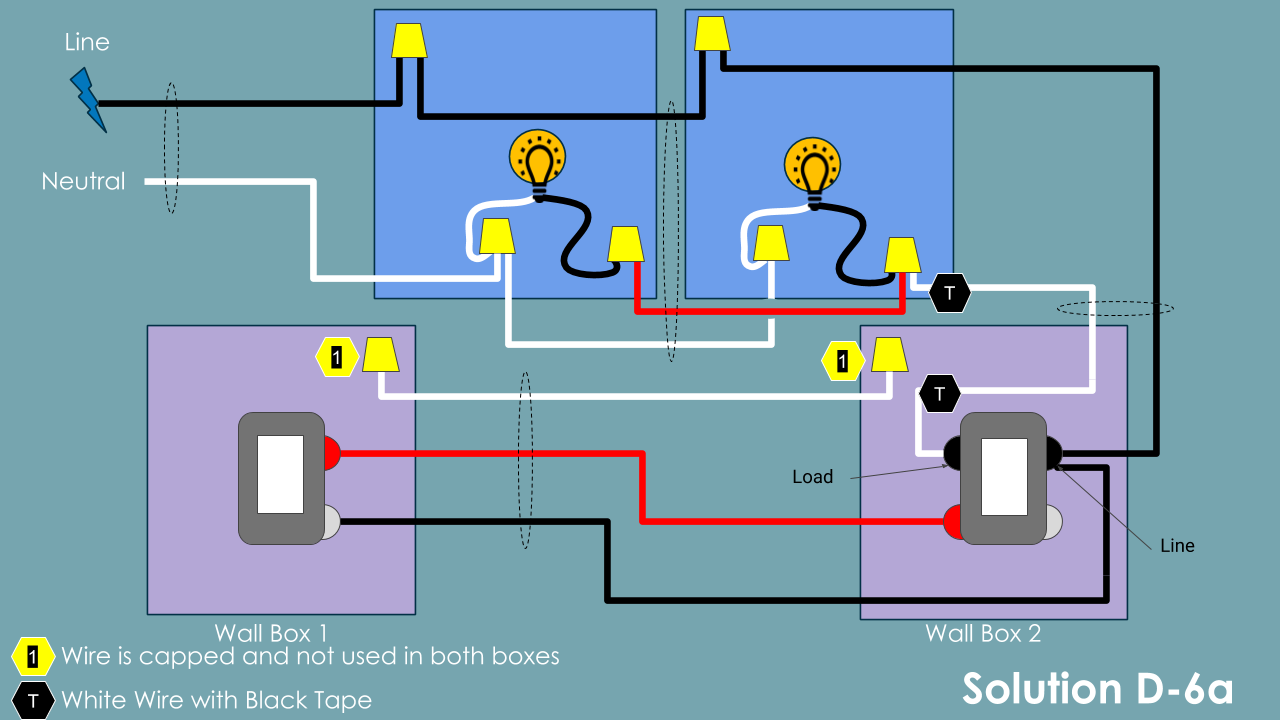
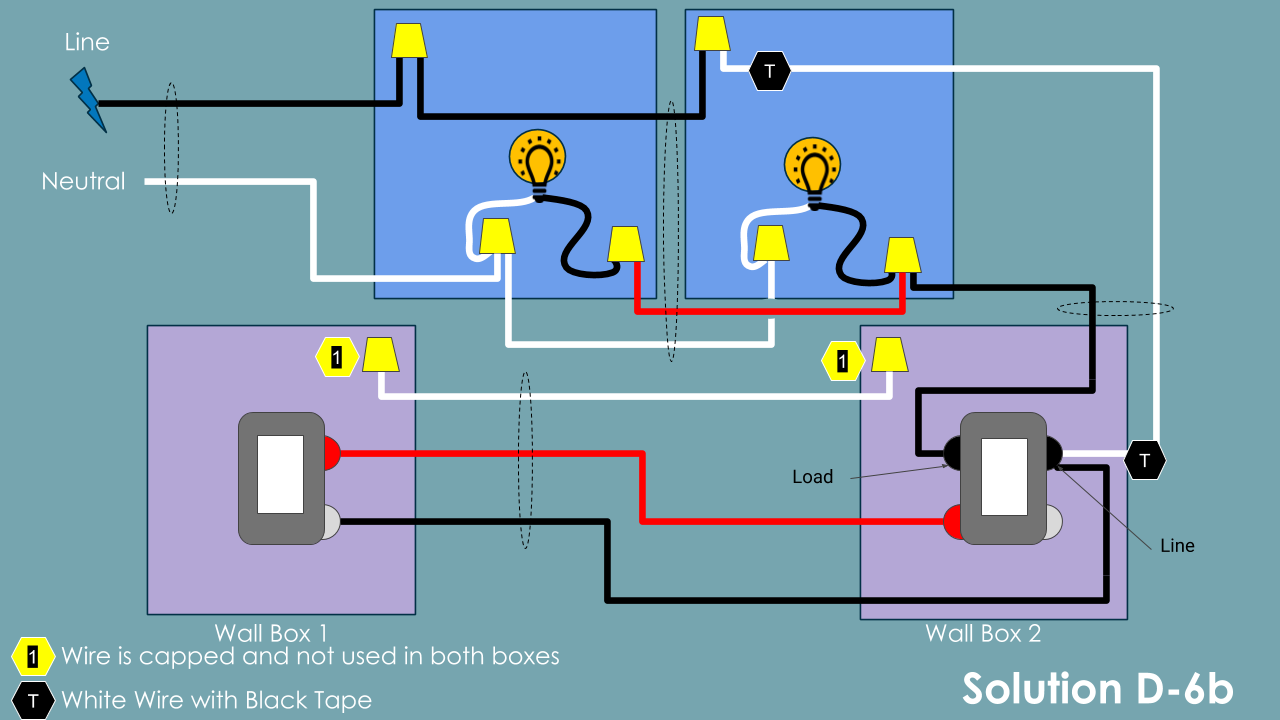
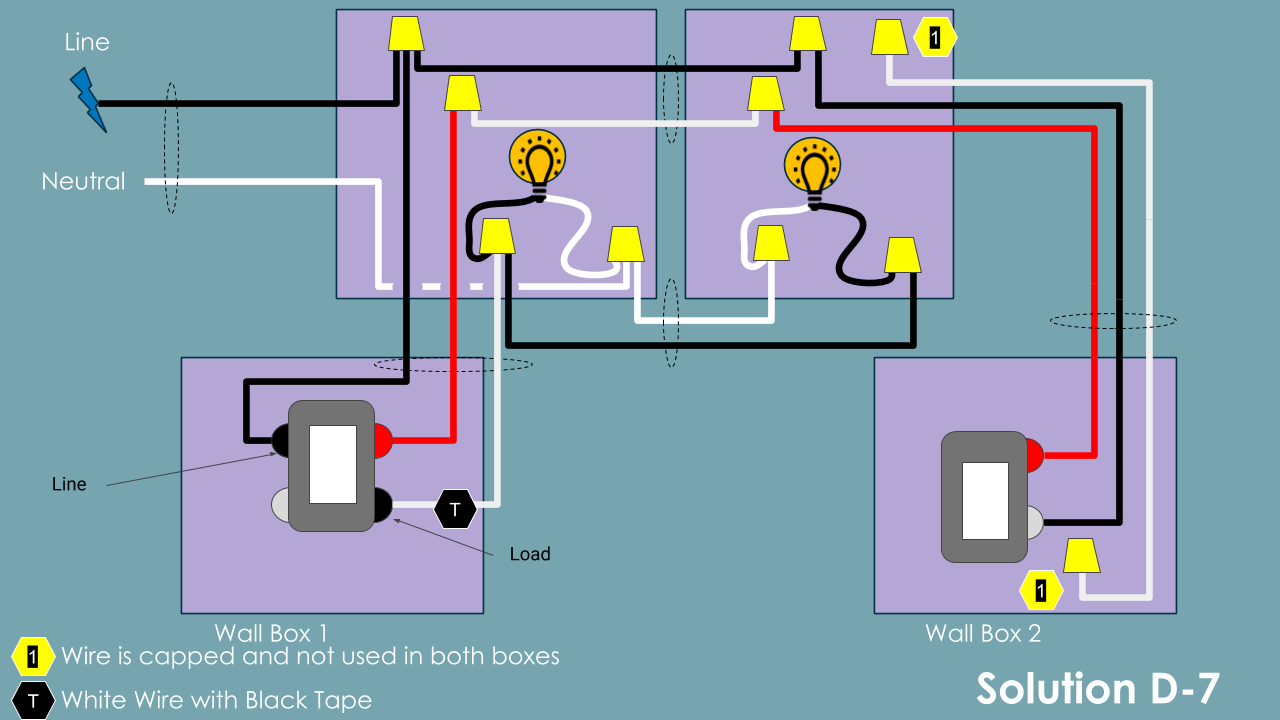
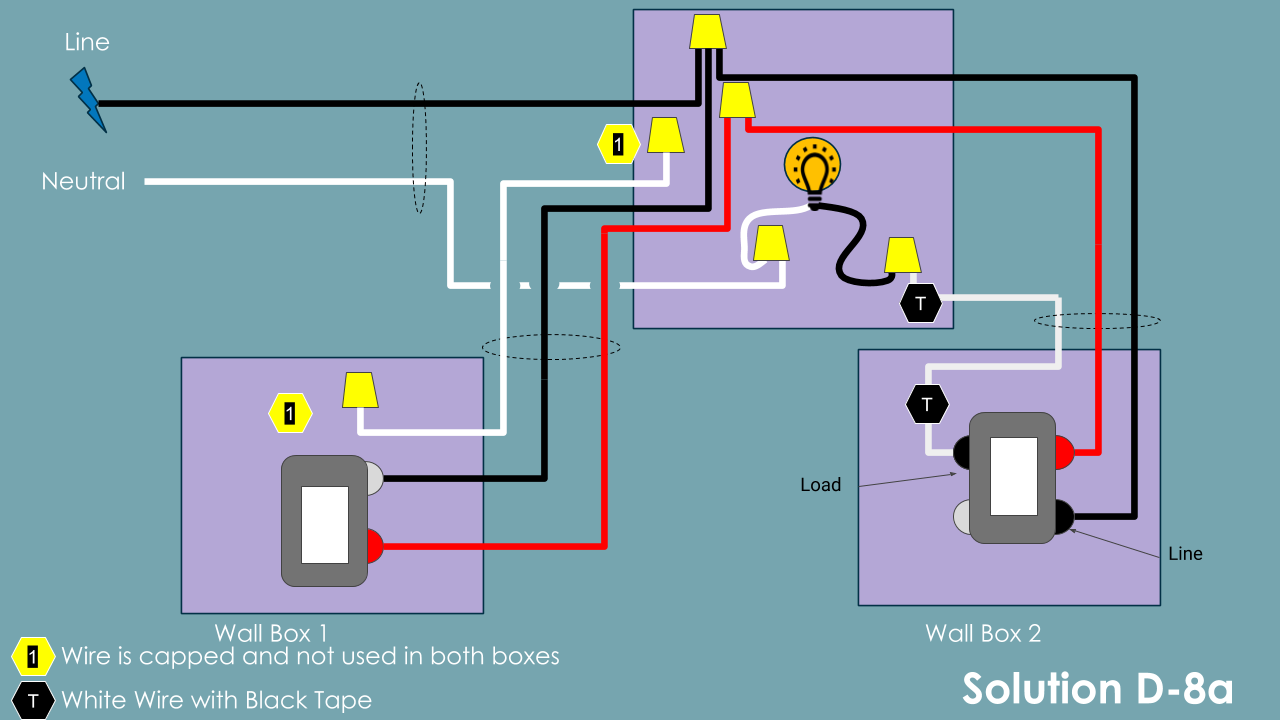
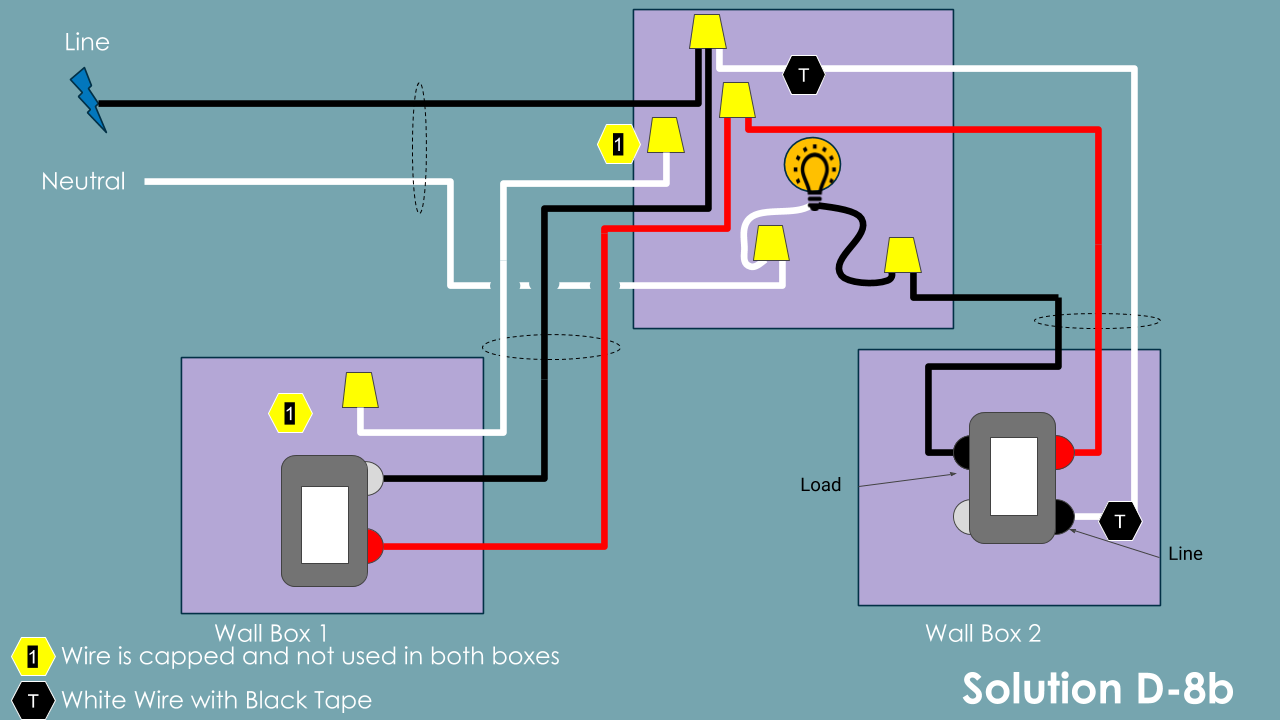
Solution D – Smart Add-On – Neutral NOT Required
Uses a smart three-way switch as the add-on switch. This is also known as a aux switch or momentary aux switch. This requires the mechanical switch to be replaced per the appropriate solution diagram.
Pros: Less costly than dual smart switch, moderately easy to install, provides dimming capability, provides up-is-on/down-is-off experience, great option if there is no neutral wire present
Cons: More costly than dumb add-on, no scenes from aux add-on switch
| Inovelli Group-2 | |
| Switch Part # |
LZW31 (black series) LZW31-SN (red series) |
| Add-on Part # | GE 12723
Honeywell 39350 |
View the Original Wiring Methods
View the Method-Solution Matrix
Solution D Notes:
- In these scenarios, the Aux switch is powered by Line voltage from the Smart Switch. You will notice that this attaches to the Aux switch Neutral screw-lug. This is intentional from the manufacturer.
- Boxes highlighted Pink require wiring changes.
- Boxes highlighted Blue do not require wiring changes unless otherwise noted.
