LIVE: Hubitat Elevation How-To Dashboards and Devices Q&A
 |
Hubitat Elevation Smart Home Automation Hub |
Live Stream Hubitat Elevation setting up devices and building dashboards. This will be a LIVE Q&A. For devices, we will cover tips on how to pair, troubleshooting, exclusion, and features of various types of devices. For Hubitat Elevation Dashboards we will cover basic settings, dashboard widgets, advanced template settings, and other tips and tricks.
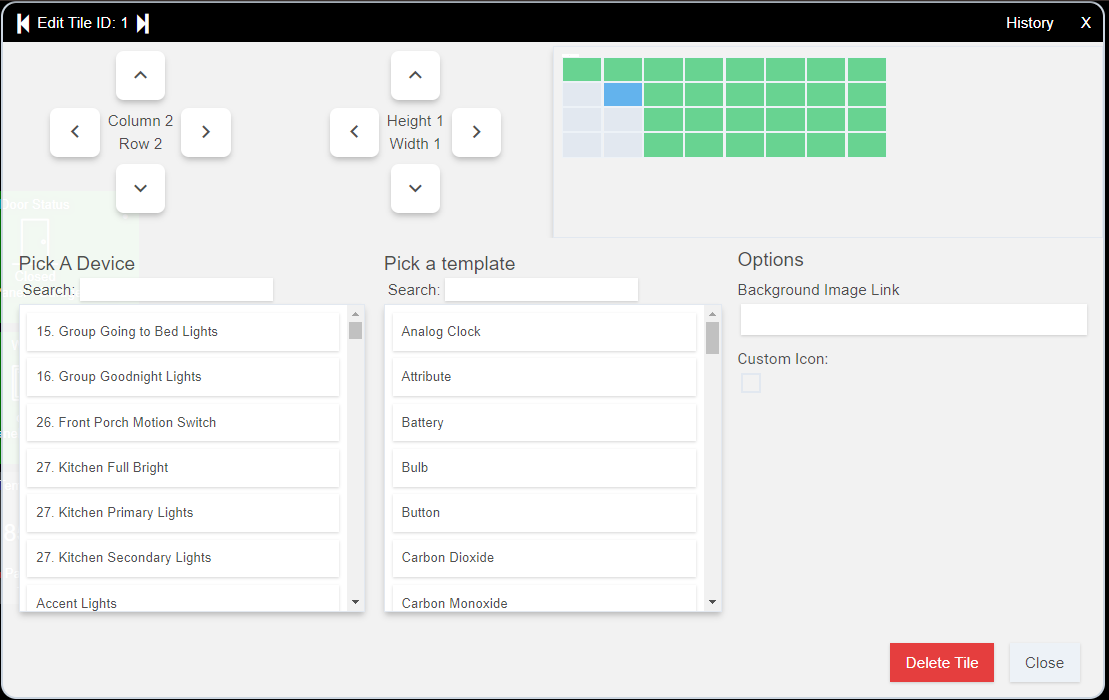
It seemed like a good idea to provide an overview of how devices work before we discuss dashboards. In Hubitat, once everything is setup, you will rarely interact with the device definition itself. Interaction will generally happen only through automation apps (Button Controller, Simple Automatons, Rule Machine, etc.) or through dashboards. A nice thing about Hubitat is that if you can see a parameter that is available for a device (on the device page), you can place that status or value onto a dashboard.
Devices
Items discussed related to devices include:
- Device Exclusion
- Device Inclusion
- Device Status’s and Values
- Exposing Additional Device Attributes
- Seeing where Devices are in use (handing if you plan to remove a device)
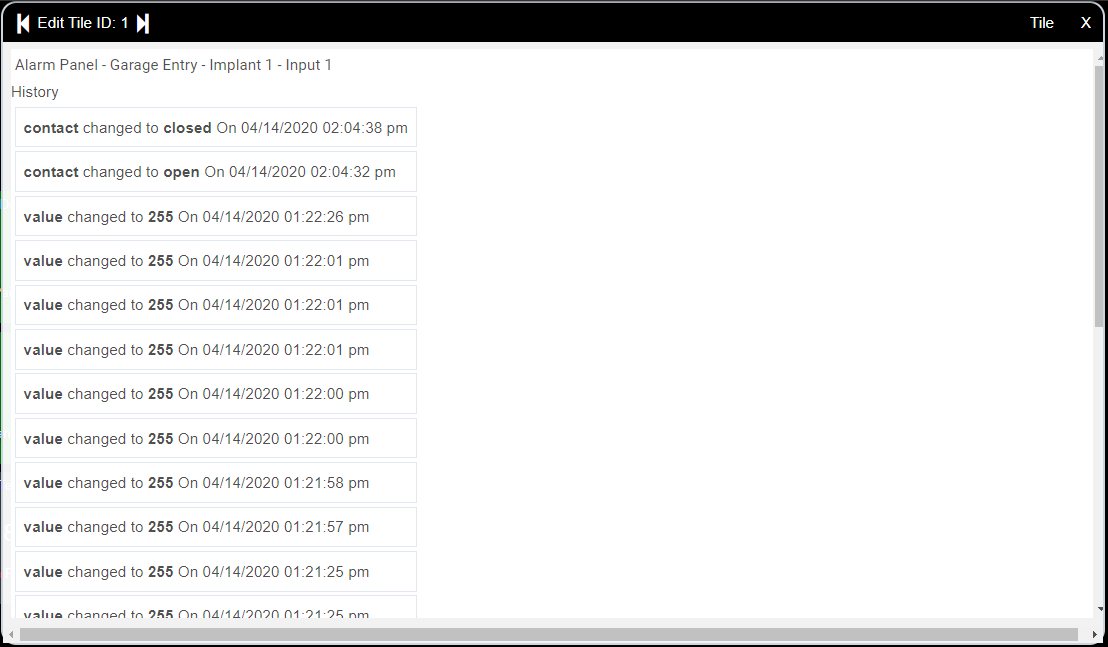
- Live and Historical Logging
- List of Supported Devices
Dashboards
Dashboards are central to Hubitat and allow you to curate your own experience for desktop PCs, mobile phones, and tablets. The Hubitat mobile app (as it stands when I wrote this) is essentially only a dashboard viewer and presence sensor. This means that you are in control of the mobile app experience. I don’t discuss the SharpTools dashboards in this video, only the Hubitat native dashboards.
Dashboard topics discussed in this video include:
- Adding the Dashboard App to Hubitat
- Setting up the Dashboard Grid
- Colors
- Columns
- Widget Height and Width
- Date and Time Formatting
- Formatting for Mobile Devices (phones)
- Formatting for Tablets
- Rearranging Devices on a Dashboard
- Customizing Widget Colors and Icons
- Adding Custom Attributes to Dashboards
Additional Information
There were a couple of details that I left out of the video. Here is some other useful information.
Accessing Device History
Each widget on a dashboard has three vertical dots in the upper right hand corner. As mentioned in the video, clicking on these dots allows you to configure the widget (move, change device parameters, etc.). Once the configure page comes up, you will see a History link in the upper right hand corner (see below image). Clicking on the History link will display the device history. Very cool!