[amazon_link asins=’B07T26MVYC,B07S1BMMGH,B07K1T8Z74,B07K37BNMC’ template=’ProductCarousel’ store=’azhb-wp-amazon-link-builder-20′ marketplace=’US’ link_id=’40c48933-9a0d-4cc0-9504-9e19ec236cc7′]
This information is for reference only. You should always rely on the manufacturer’s instructions when performing switch installations. Manufacturer instructions can change at any time and this website cannot guarantee the accuracy of the information.
Wan’t more help? Join the DIY Smart Home Guy Facebook Group! It’s the best place to ask questions and get help on topics covered in my videos and on my website. There are lot’s of other smart people there as well. If I can’t help, maybe someone else can. Give it a shot. |
WARNINGS AND CAUTIONS:
- TO AVOID FIRE, SHOCK OR DEATH; TURN OFF POWER AT CIRCUIT BREAKER OR FUSE AND TEST THAT POWER IS OFF BEFORE WIRING!
- To be installed and/or used in accordance with electrical codes and regulations.
- If you are unsure about any part of these instructions, consult an electrician.
- Manufacturer smart-switches must be used with compatible devices for multi-location switching.
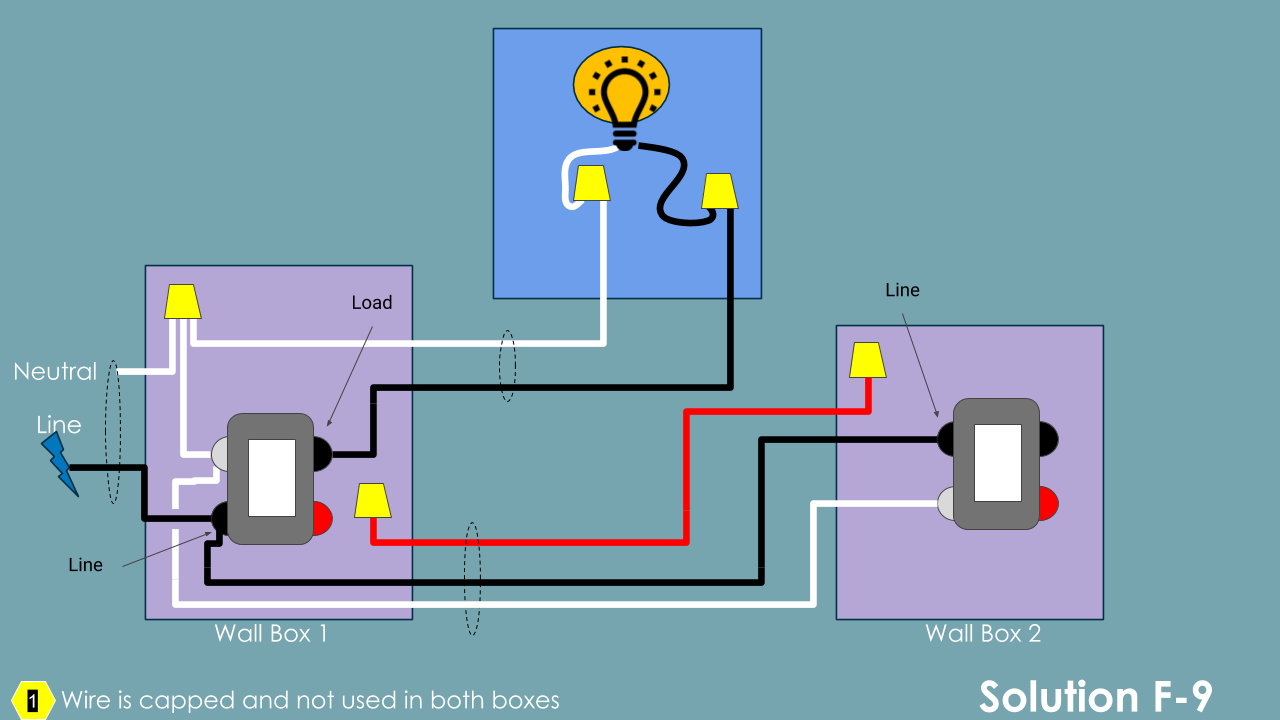
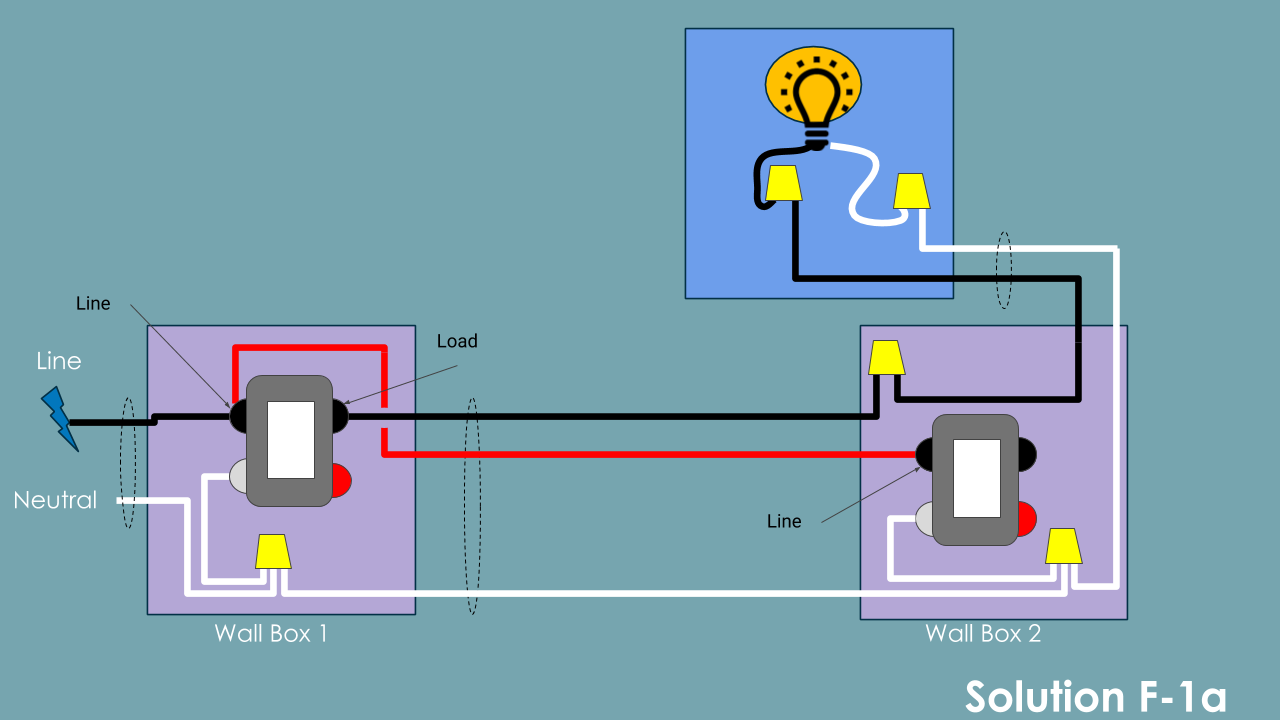
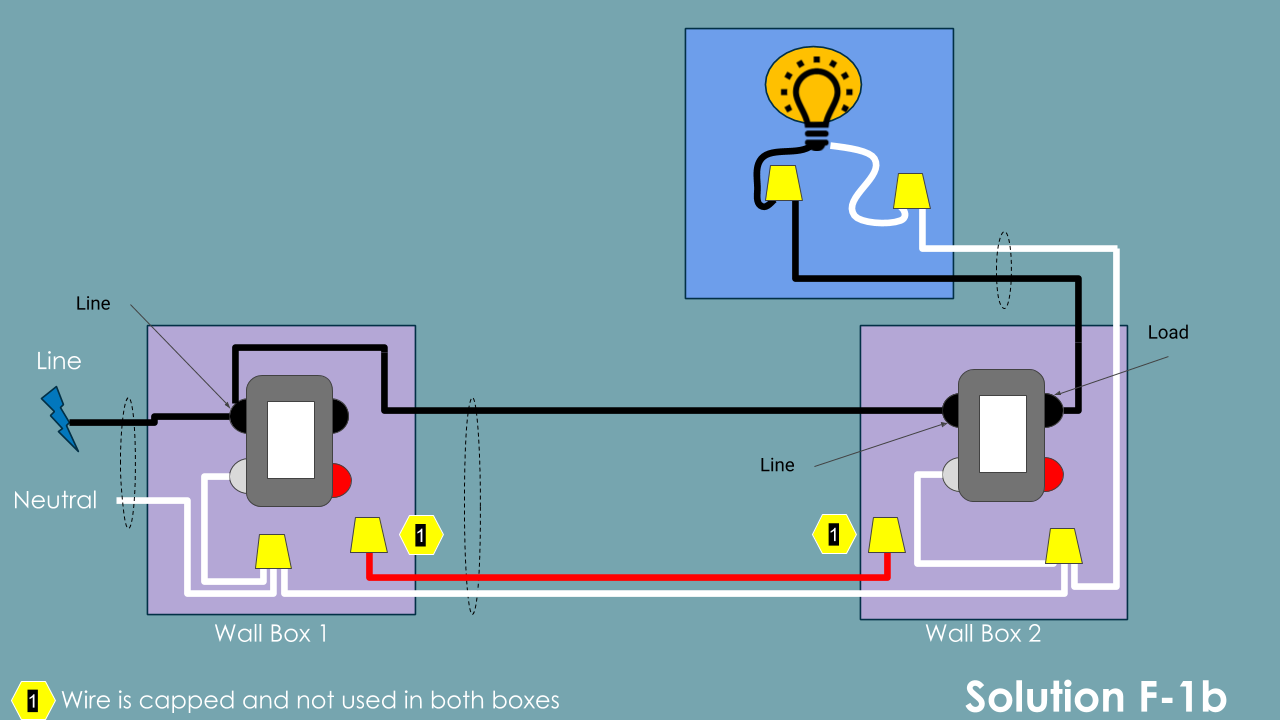
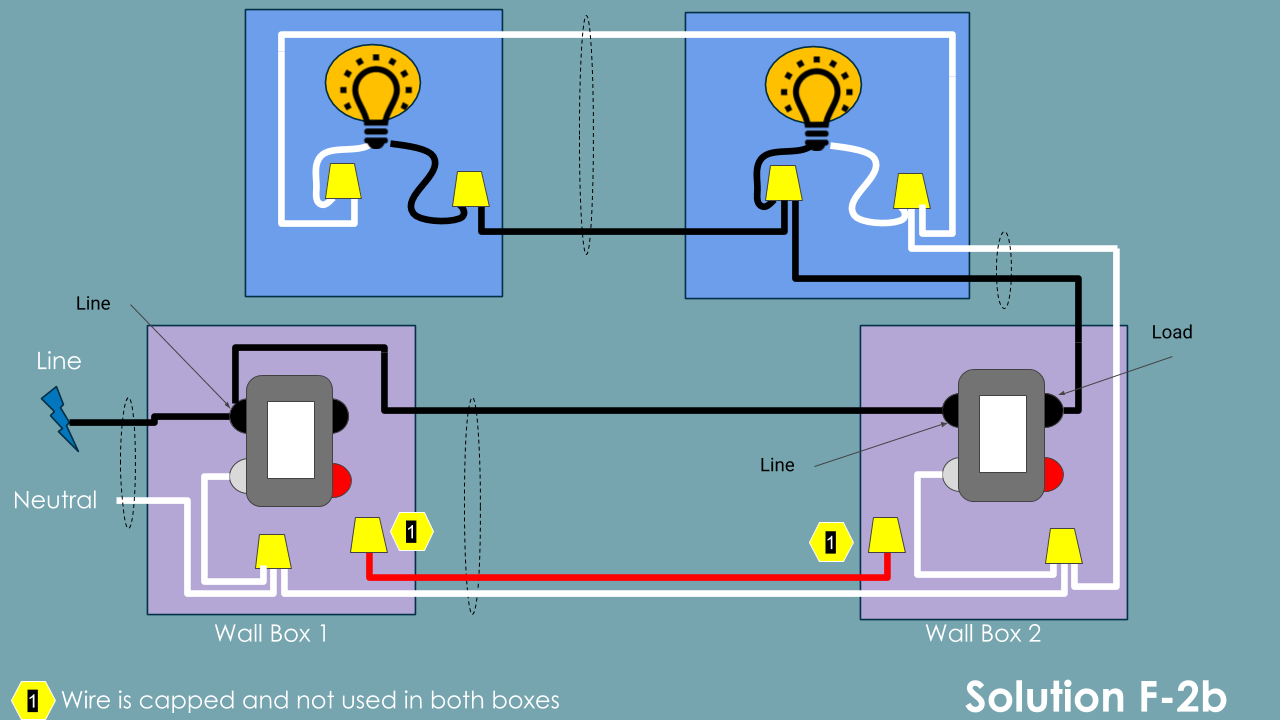
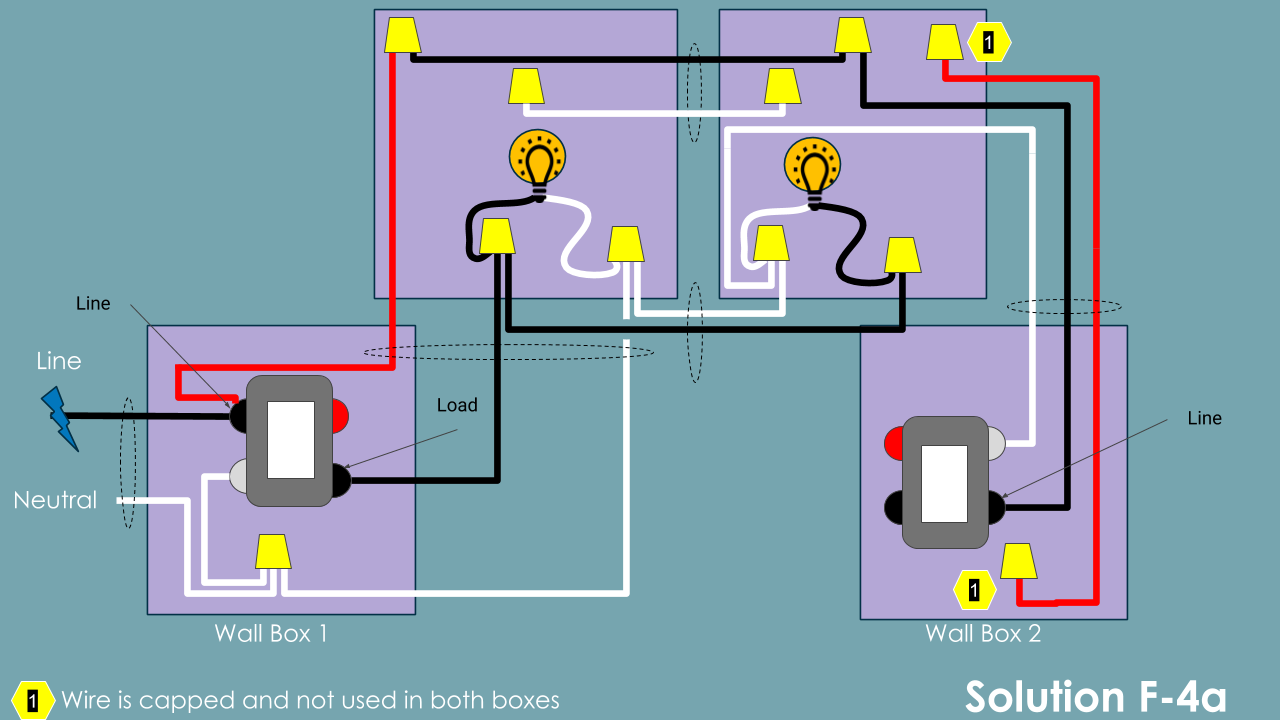
Solution F – Dual Smart Switch
Uses two smart switches, one as master and one as slave. Only possible with switches and hubs that support device association. Used if you want to mirror two switches on the same (or different) circuits for on/off and dimming. Button-tapping is not mirrored.
Pros: user experience same from all switches including multi-tap and scenes
Cons: costly, can be complex to set up switch associations
| Brands | |
| Switch Part # | Any Z-Wave Plus switch that supports Z-Wave association |
| Add-on Part # | Any Z-Wave Plus device that can be controlled through associations |
View the Original Wiring Methods
View the Method-Solution Matrix
| SmartThings | Hubitat | |
| Z-Wave Tweaker to create associations between devices. | Use the Inovelli Z-Wave association Tool (parent and child app) | |
| on/off | Group 2 | |
| dimmer | Group 4 | |
| scenes | Replicate Automation: Simple Lighting WebCore Etc. |
Replicate Automation: Rule Machine Simple Lighting WebCore Etc. |
Solution Notes:
- Pay close attention to the line and load wiring. Solution F requires Line power at both switches.
- Boxes highlighted Pink require wiring changes.
- Boxes highlighted Blue do not require wiring changes unless otherwise noted.
- Ensure all dimming and ramp rate settings are identical between the switches. This will ensure consistent dimming and on/off performance.
- Use identical lights on a multi-light circuit to ensure both balanced loads and dimming / on-off performance.
- DO NOT create bi-directional associations. Example DO NOT
- Make switch 1 primary over switch 2, then create a second association where switch 2 is primary over switch 1.
- Set the switch that is NOT controlling the load as the SOURCE and the load controlling switch as the DESTINATION.


Solution F-3 Notes:
CAUTION
The black wire that runs from Wall Box 1 to the light was originally a Load-Traveler. This solution converts that wire to a neutral wire. Using a black wire as a neutral is not a standard practice.
- This is an electrically correct solution, however, the wire markings could be confusing for anyone that accesses the switch box in the future.
- It is recommended that the black wire in the Light Box be marked with white tape in addition to the associated wire in Wall Box 1.
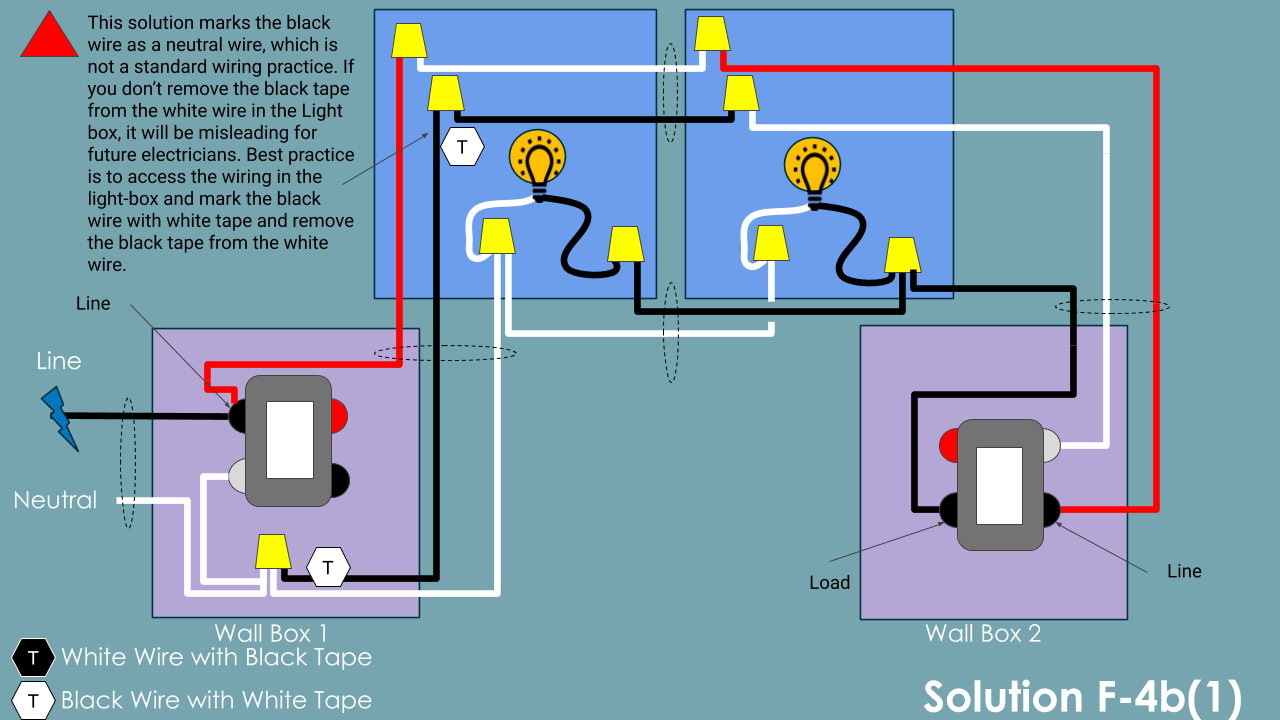
Solution F-4b(1) Notes:
CAUTION
The black wire that runs from Wall Box 1 to the light was originally a Load-Traveler. This solution converts that wire to a neutral wire. Using a black wire as a neutral is not a standard practice.
- This is an electrically correct solution, however, the wire markings could be confusing for anyone that accesses the switch box in the future.
- It is recommended that the black wire in the Light Box be marked with white tape in addition to the associated wire in Wall Box 1.
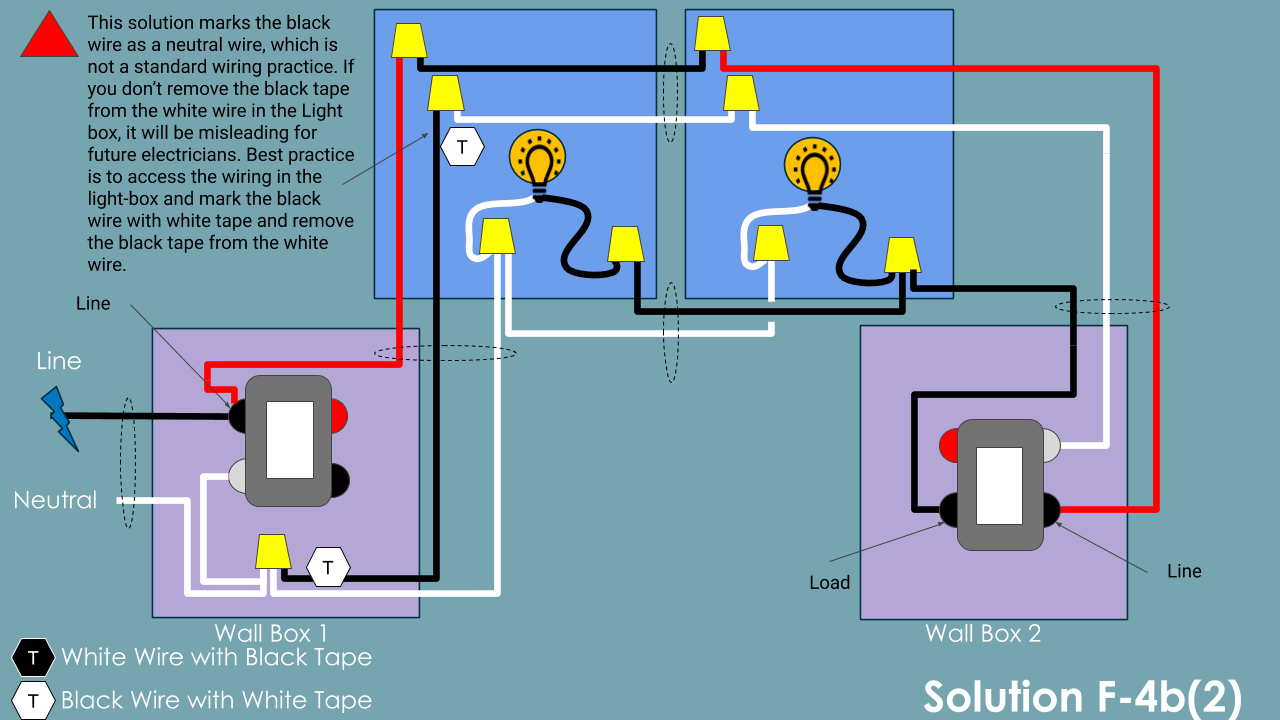
Solution F-4b(2) Notes:
CAUTION
The black wire that runs from Wall Box 1 to the light was originally a Load-Traveler. This solution converts that wire to a neutral wire. Using a black wire as a neutral is not a standard practice.
- This is an electrically correct solution, however, the wire markings could be confusing for anyone that accesses the switch box in the future.
- It is recommended that the black wire in the Light Box be marked with white tape in addition to the associated wire in Wall Box 1.
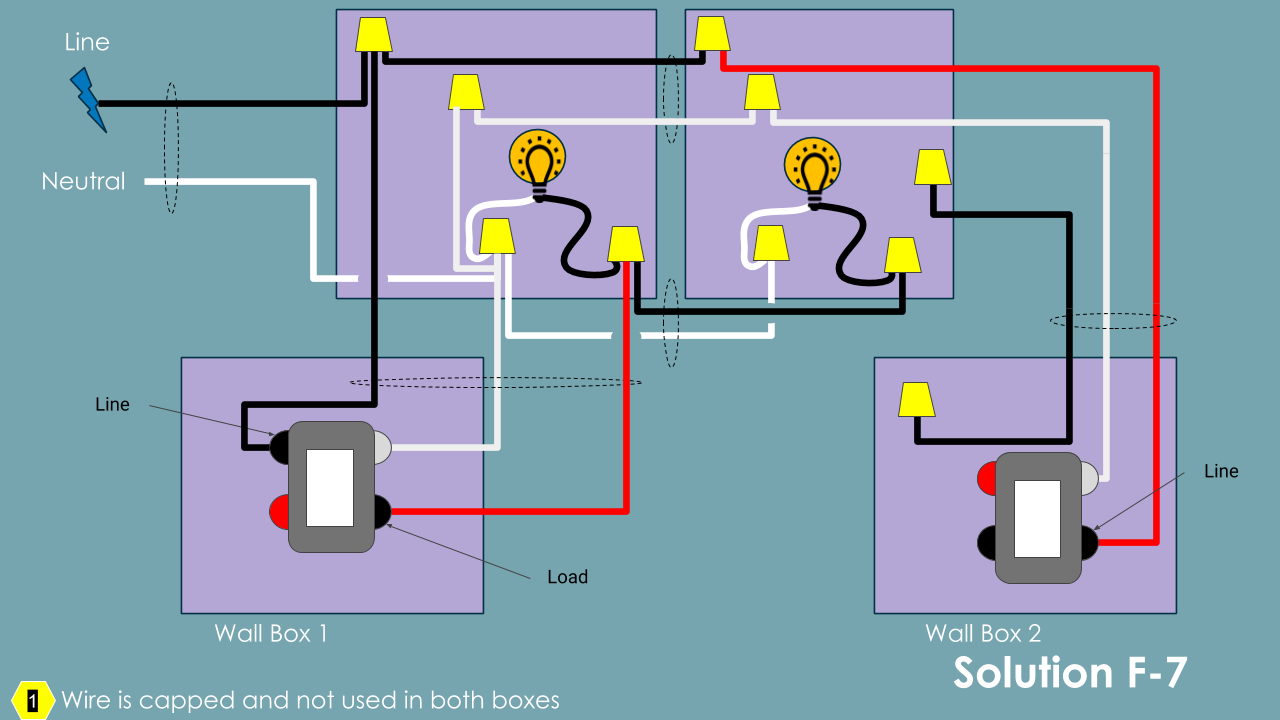
Solution F-7 Notes:
Since the original wiring method does not provide a neutral-wire to Wall Box 2, it is necessary to rewire both light boxes to provide a neutral run to the slave Z-Wave Plus switch.
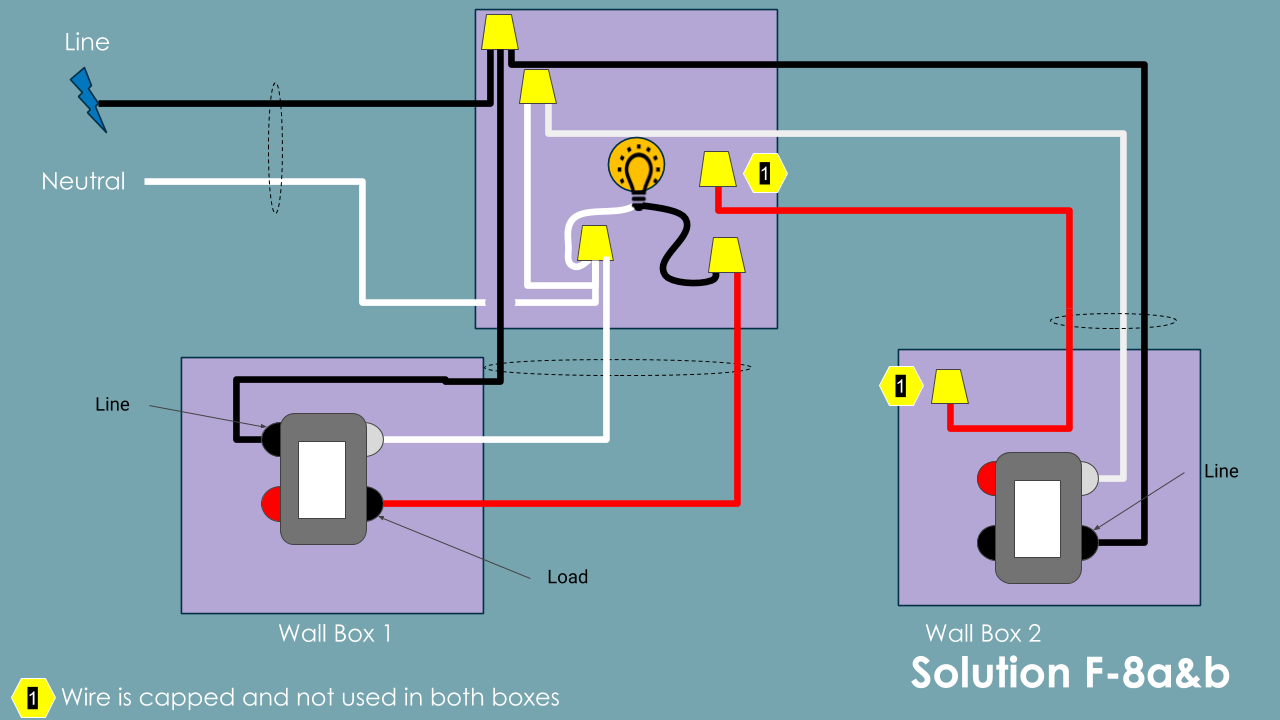
Solution F-8 Notes:
Since the original wiring method does not provide a neutral-wire to Wall Box 2, it is necessary to rewire both light boxes to provide a neutral run to the slave Z-Wave Plus switch.
The Solution for wiring Method 8a and 8b is the same.