[amazon_link asins=’B07K1T8Z74,B07T26MVYC,B07K37BNMC,B07S1BMMGH’ template=’ProductCarousel’ store=’azhb-wp-amazon-link-builder-20′ marketplace=’US’ link_id=’1a69b996-2208-40d0-8be2-7cdd4299a24c’]
This information is for reference only. You should always rely on the manufacturer’s instructions when performing switch installations. Manufacturer instructions can change at any time and this website cannot guarantee the accuracy of the information.
WARNINGS AND CAUTIONS:
- TO AVOID FIRE, SHOCK OR DEATH; TURN OFF POWER AT CIRCUIT BREAKER OR FUSE AND TEST THAT POWER IS OFF BEFORE WIRING!
- To be installed and/or used in accordance with electrical codes and regulations.
- If you are unsure about any part of these instructions, consult an electrician.
- Manufacturer smart-switches must be used with compatible devices for multi-location switching.
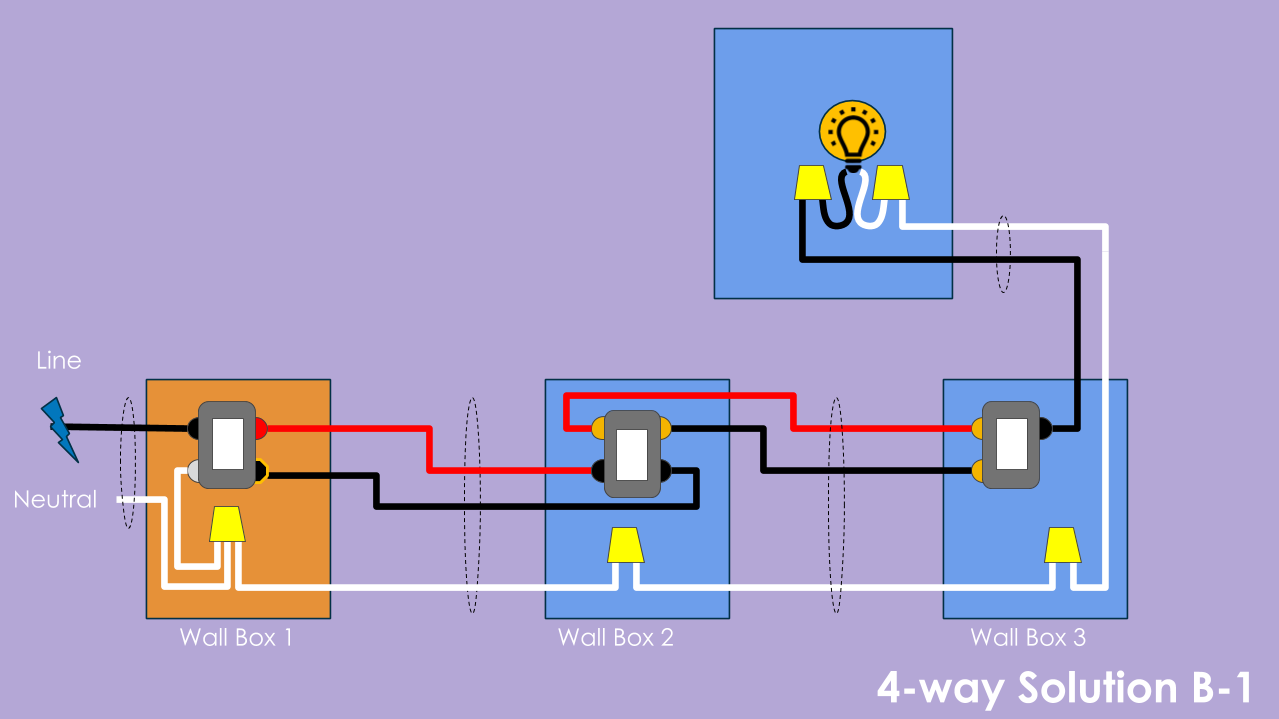
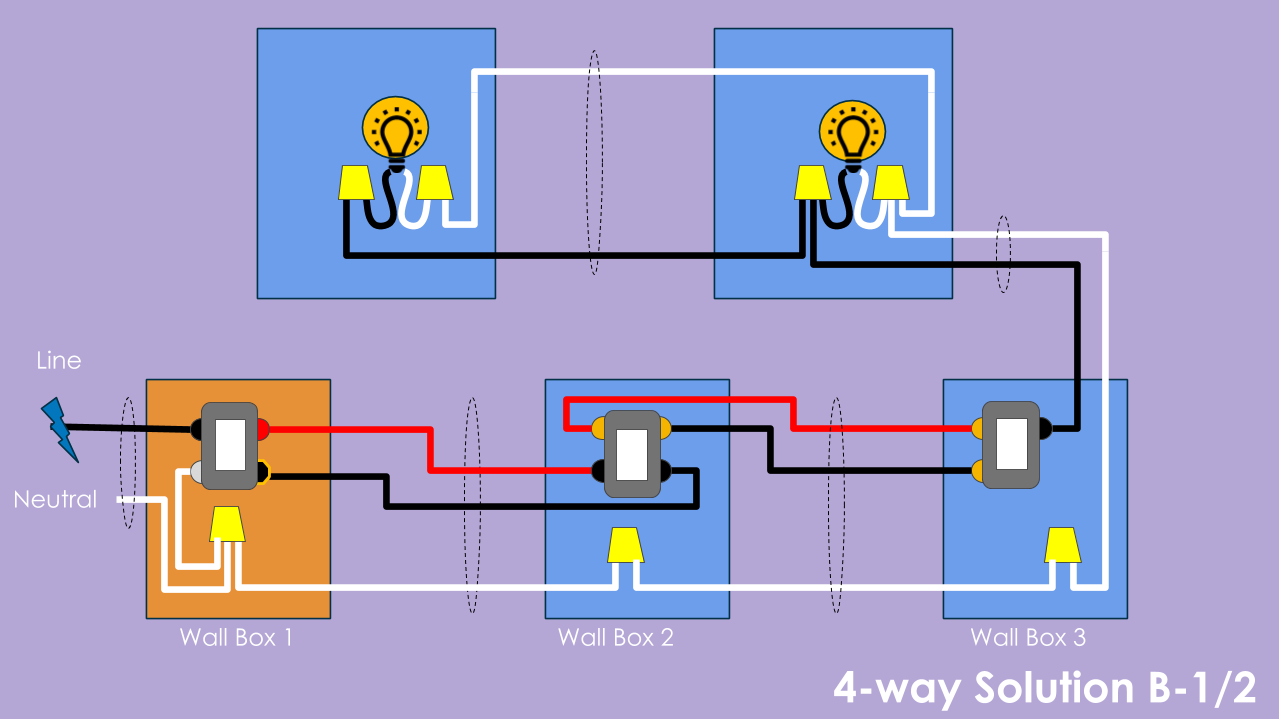
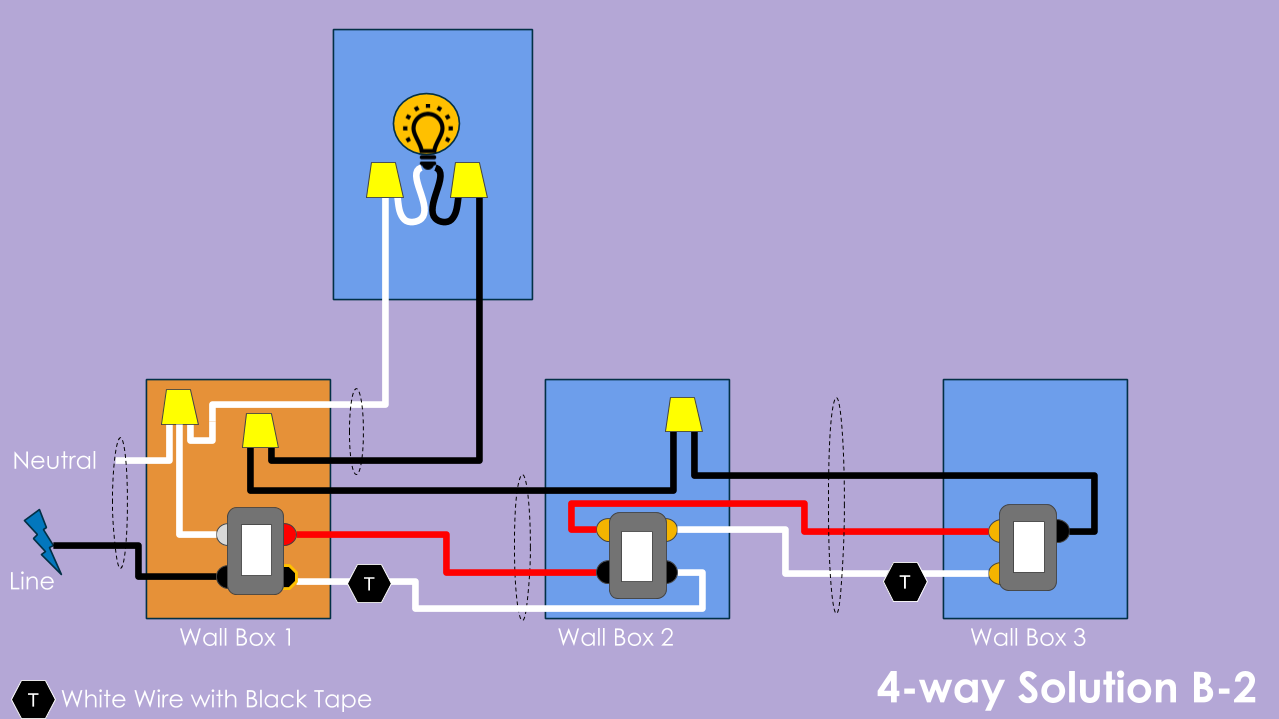
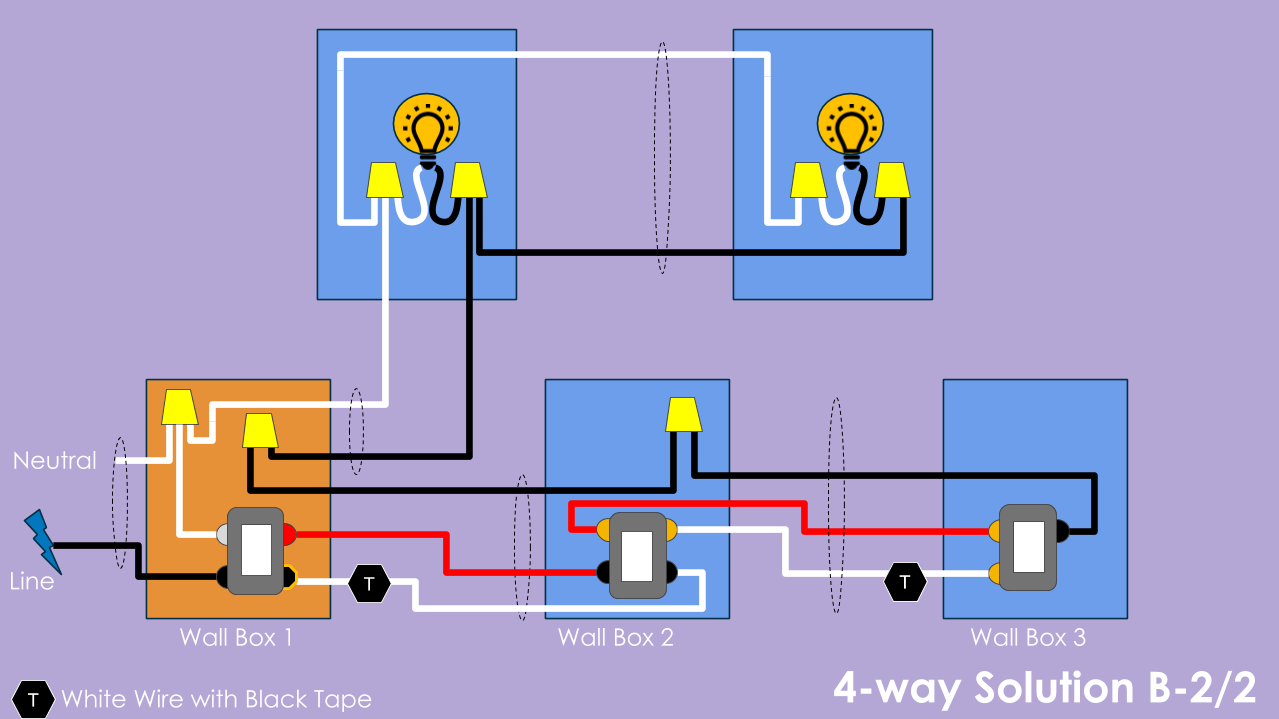
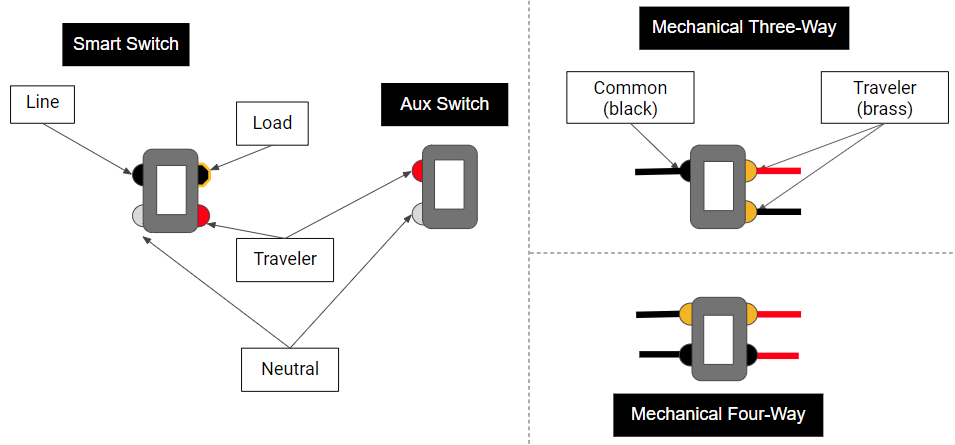
Solution B – Mechanical Toggle – Aux Switch Rewire NOT Required
Uses a normal four-way and three-way switch as the add-on switches. This is also known as a mechanical three-way/four-way or a dumb add-on switch. This DOES NOT require the mechanical switch to be rewired. This is the simplest wiring solution.
Pros: Inexpensive, easy to install
Cons: No dimming capability, does not provide up-is-on/down-is-off experience, no scenes from dumb add-on switch
| Zooz Group-2 | Inovelli Group-2 | |
| Switch Part # | Zooz Zen26 | LZW30 |
| Add-on Part # | Mechanical | Mechanical |
Helpful Tools
[amazon_link asins=’B000H6K7Z0,B000BQUUVC,B000EJ332O,B07NPGV7G2,B00FZPDG1K’ template=’ProductCarousel’ store=’azhb-wp-amazon-link-builder-20′ marketplace=’US’ link_id=’bc74ea83-a988-478d-8667-114e53988a85′]
View the Original Wiring Methods
View the Method-Solution Matrix
Solution Notes:
- Boxes highlighted Orange require wiring changes.
- Boxes highlighted Blue do not require wiring changes unless otherwise noted.